Dreamweaver Tutorials
Hypertext | HTML | Basic Page Layout | Start | Menus | Properties | Panels | Objects | Document | Editing | Prefereneces
This area not open yet

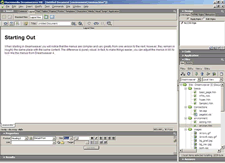
 When starting in dreamweaver you will notice that the menus are complex
and vary greatly from one version to the next; however, they remain in
roughly the same place with the same content. The difference is purely
visual. In fact, to make things easier, you can adjust the menus in MX
to look like the menus from Dreamweaver 4.